Stray Cat
Philosopher
- Joined
- Sep 6, 2006
- Messages
- 6,829
So, at this the point we've got to:
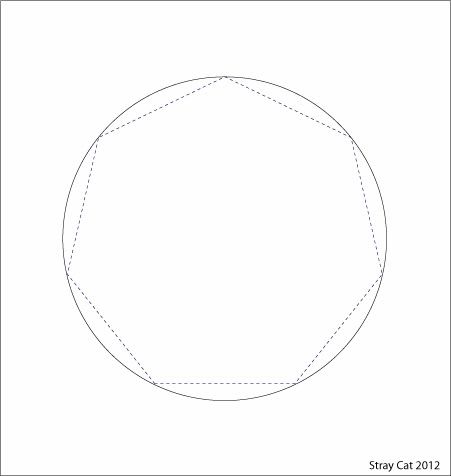
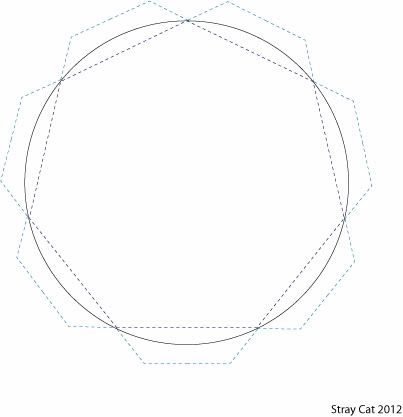
We have a heptagon marked out inside a large circle.
The next step is arranging the smaller pairs of heptagons around it's perimeter. To do this we take just one of the seven sides.
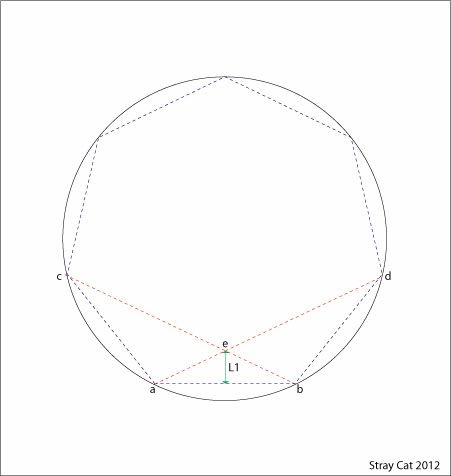
And by extending a tape along line a/d and one along b/c, we get intersection e.
A measure from e back to the line describing the edge of the large heptagon gives L1.
We need to measure the same (L1) beyond the circumference of the circle
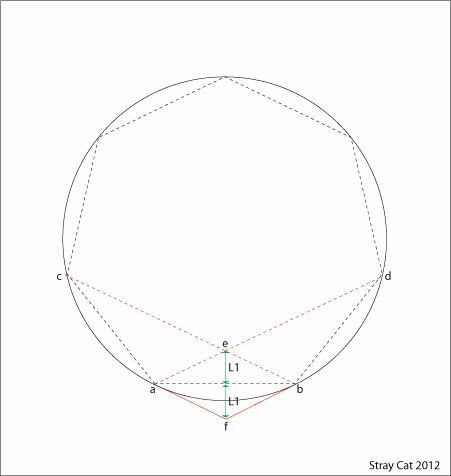
We now also have point 'f'.
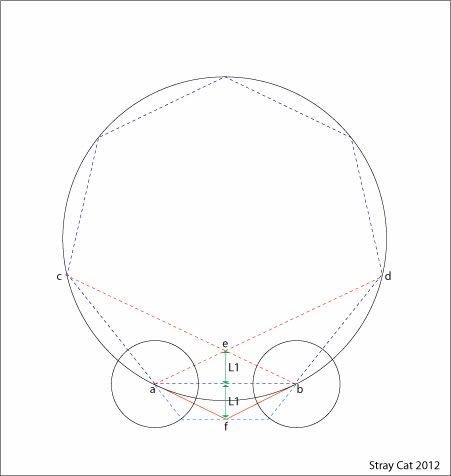
From point 'f' we run a line to point 'a' and halfway along that line is the radius we need to mark the outer points of the smaller pairs of heptagons (the two circles shown in black and centered on 'a' and 'b').
The blue dotted line marked c/a is then extended by the radius amount and the same is done for line b/d. These points are then joined by a straight line (shown in pale blue dotted).
The same process is repeated another six times for each of the seven sides.
As you can see, the original footline circle is now within the crop that will later be flattened.
So, onto the inner part of the formation. There is actually no need to mark out fully the pairs of small heptagons because they aren't really there. The illusion is that they have been individually marked out but this is not the case.
All you need to do it take a line from one of the outer corners (pale blue dotted) and run a tape to it's opposite corner.
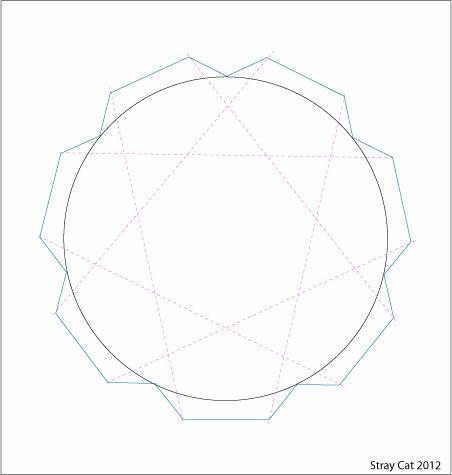
Repeating the same for each edge. Then take (probably one or two board widths) and mark out the inner lines which run parallel.
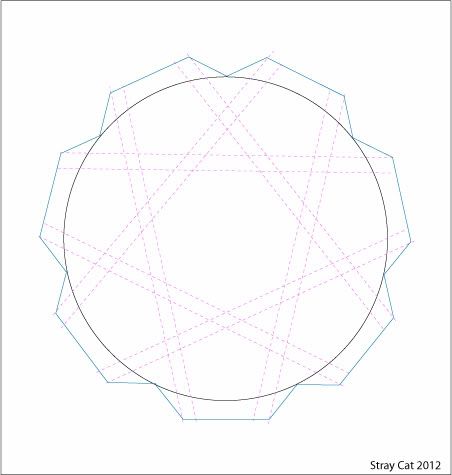
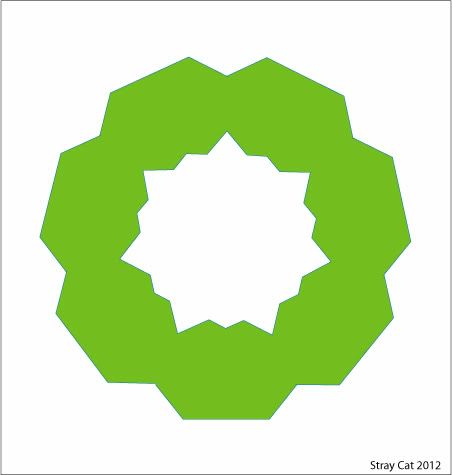
This will build up the inner pattern thus;
This has taken about 10 minutes per side and 20 minutes for the original heptagon plotting (90 minutes total) You're now ready to start stomping.
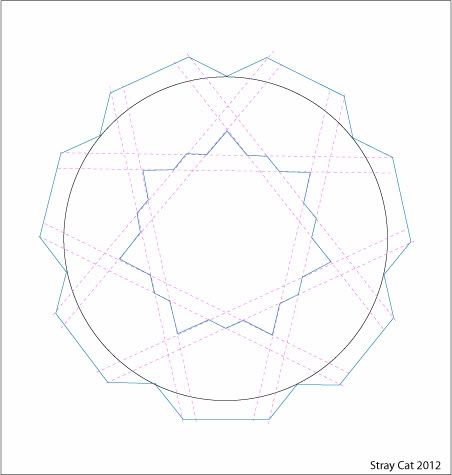
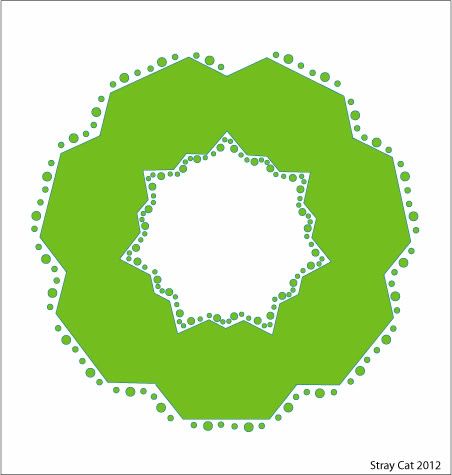
Now all that's needed is to add the (rather messy) grapeshot around the inner and outer edges.
All done within 3 hours, lets go and get some sleep back at the Barge campsite.")
We have a heptagon marked out inside a large circle.
The next step is arranging the smaller pairs of heptagons around it's perimeter. To do this we take just one of the seven sides.
And by extending a tape along line a/d and one along b/c, we get intersection e.
A measure from e back to the line describing the edge of the large heptagon gives L1.
We need to measure the same (L1) beyond the circumference of the circle
We now also have point 'f'.
From point 'f' we run a line to point 'a' and halfway along that line is the radius we need to mark the outer points of the smaller pairs of heptagons (the two circles shown in black and centered on 'a' and 'b').
The blue dotted line marked c/a is then extended by the radius amount and the same is done for line b/d. These points are then joined by a straight line (shown in pale blue dotted).
The same process is repeated another six times for each of the seven sides.
As you can see, the original footline circle is now within the crop that will later be flattened.
So, onto the inner part of the formation. There is actually no need to mark out fully the pairs of small heptagons because they aren't really there. The illusion is that they have been individually marked out but this is not the case.
All you need to do it take a line from one of the outer corners (pale blue dotted) and run a tape to it's opposite corner.
Repeating the same for each edge. Then take (probably one or two board widths) and mark out the inner lines which run parallel.
This will build up the inner pattern thus;
This has taken about 10 minutes per side and 20 minutes for the original heptagon plotting (90 minutes total) You're now ready to start stomping.
Now all that's needed is to add the (rather messy) grapeshot around the inner and outer edges.
All done within 3 hours, lets go and get some sleep back at the Barge campsite.
")
